Data Validation
This section explains the Excenit RSS validation process in detail.
Overview
Data validation is key to Excenit RSS. All values are validated against BoG rules. By default, data are validated during the data load process. However, data can be re-validated. Data loaded for returns must be re-validated to ensure compliance with BoG rules.
After validation is complete (either as part of the data load process or separately), the results will be summarized in the "Data Load" tab of the return.
Validation marks each record as either Valid, Warning, or Error. Records marked as Valid have passed the BoG rules for each column. If a record is marked as Warning then it means at least one of the columns has a warning. The same goes for Error markings. Records that fail validation (Error) will not be accepted by BoG. BoG rejects an entire return even if there’s a single error.
Warnings on the other hand will not be rejected by BoG, but they require attention.
Validation Types
Excenit RSS identifies five (5) types of validation, which are flagged as Error or Warning depending on the context.
The validation types are:
-
Decimal places - Shown when the number of decimal places exceed what BoG requires. If desired, the Administrator can set the system to round up all decimal values to 2 places. Otherwise, the records will be marked with
Error. -
Invalid values - Shown when the values are different from what BoG expects for the field. For example, gender should be either Male or Female. Anything else would cause this type of issue.
-
Missing - Shown when an expected value for a field is absent.
-
Numeric sign - Shown the sign of a numeric value deviates from the BoG rule. For example, having a negative value instead of positive. This type of violation occurs typically with financial statements where the original data has negative sign but BoG’s template and formulas expect a positive number.
-
Range - Shown when the value is outside the expected range. For example, in MAFI 100 if the
Loan Disbursement Dateis after the reportAs Of Date, aRangeviolation is reported.
Validate Data
If you change the loaded data or make manual entries, it is important to re-validate the data to ensure compliance with BoG rules. To validate a return, click the  in the
 Action Bar button to re-validate. All annexes in the return will be validated and the validation report updated.
If you want to validate a single annex, navigate to that Action tab on that annex and click the validate button.
Review Validation Report
Follow the following steps to review the validation report for a return.
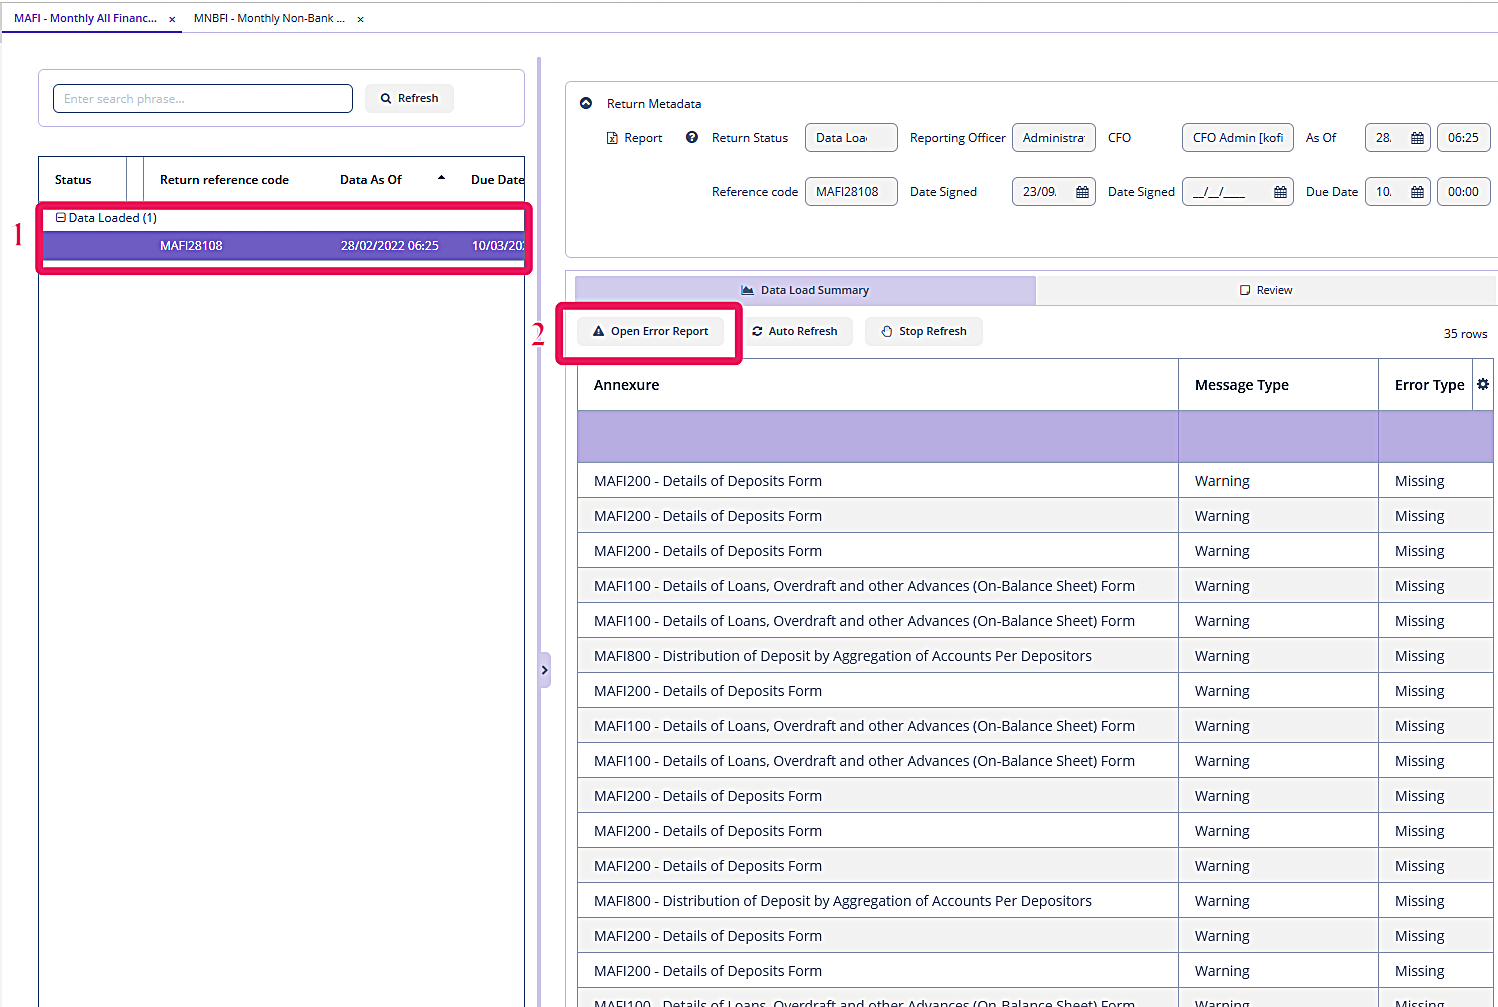
-
Open the return in either edit or view mode.
-
Click
Open Error Report.
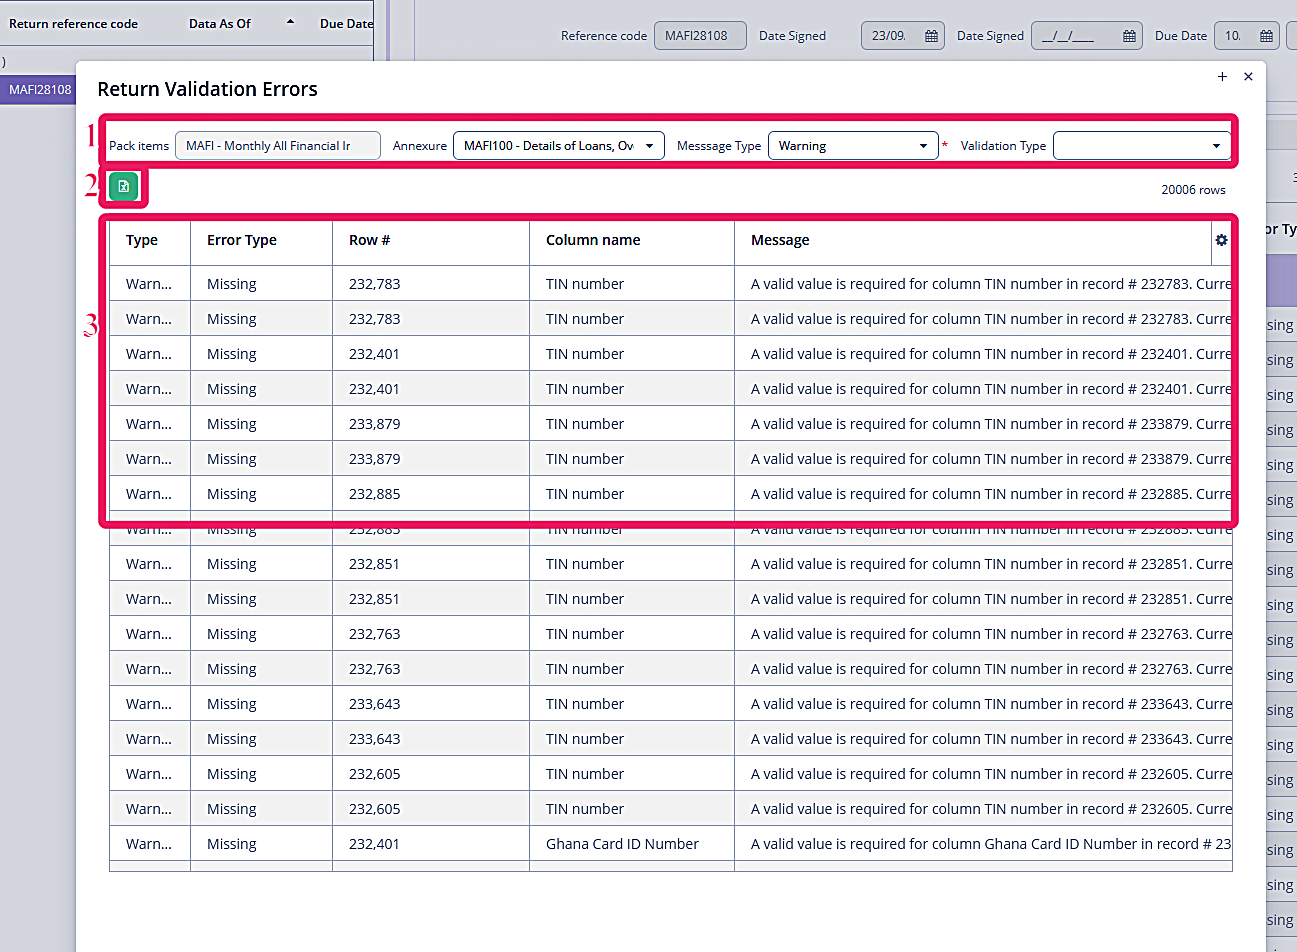
-
Filter - Use the items here to filter the validation report. Depending on the volume of data, there will be a lot of records and Excel limits the number of records per sheet to one million. You can filter by annex, message type, or validation type. The return is automatically selected and not editable. To filter the records, select an annex within the return. All errors and warnings will be automatically displayed in the data pane. You can further filter on
Message Typevalues such asError,Warning, orAllto show both errors and warnings. You can also filter on theValidation Type. Each filtering selection is executed automatically. -
Export - Export the validation results from the
data paneinto Excel. Remember, Excel limits the number of records in a sheet to one million, so use as many filters as possible to limit the number of records. The Excel file will be downloaded into your browser’s default download folder. The exported data look exactly as appears in thedata pane. -
The
data pagecontains the filtered validation results. The last column,Messageprovides detailed explanation of the error. TheRow #column points to the record in thestagingordata warehousewhere the data from the core banking environment or other sources are stored for loading.